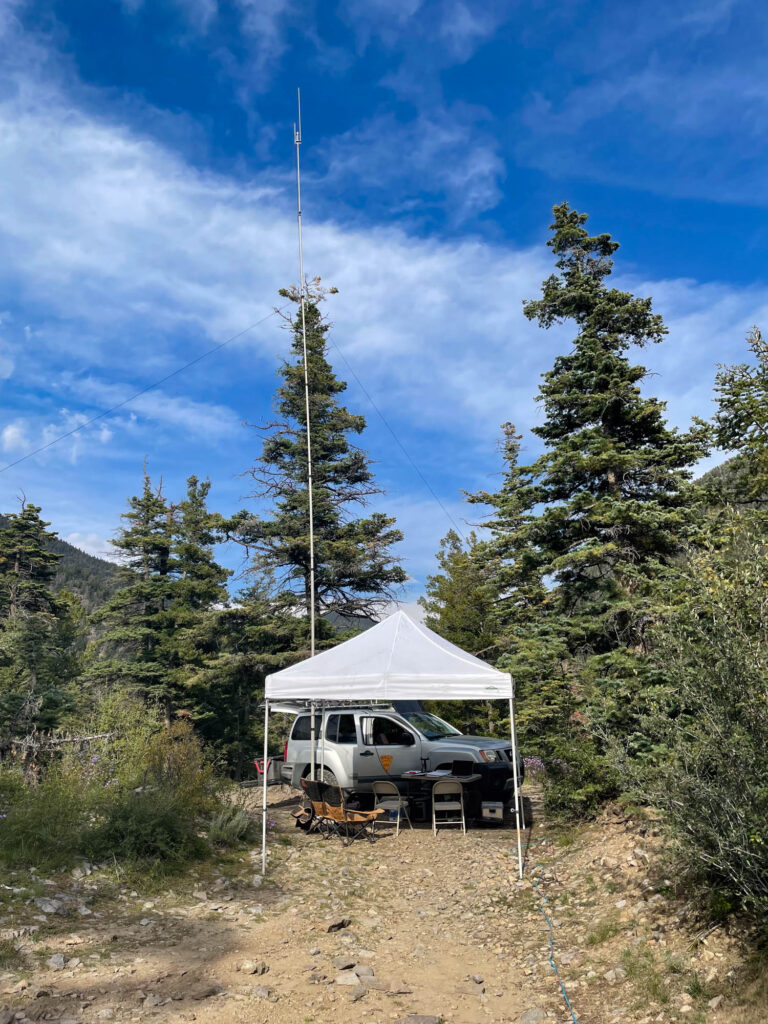
For radio communications, line of sight is paramount. With nothing blocking the path between two 5 W handhelds, clear coms of over 30 miles are possible. With a hillside in the way, you might not have reception from 0.25 mile.
Putting an antenna on the roof of the vehicle is better than ear level. But better yet is putting the antenna way up in the sky with a telescoping fiberglass mast.
I like the kits from Max-Gain Systems. DX engineering sells them as well.
Here are the relevant considerations when choosing a mast:
Clamping design
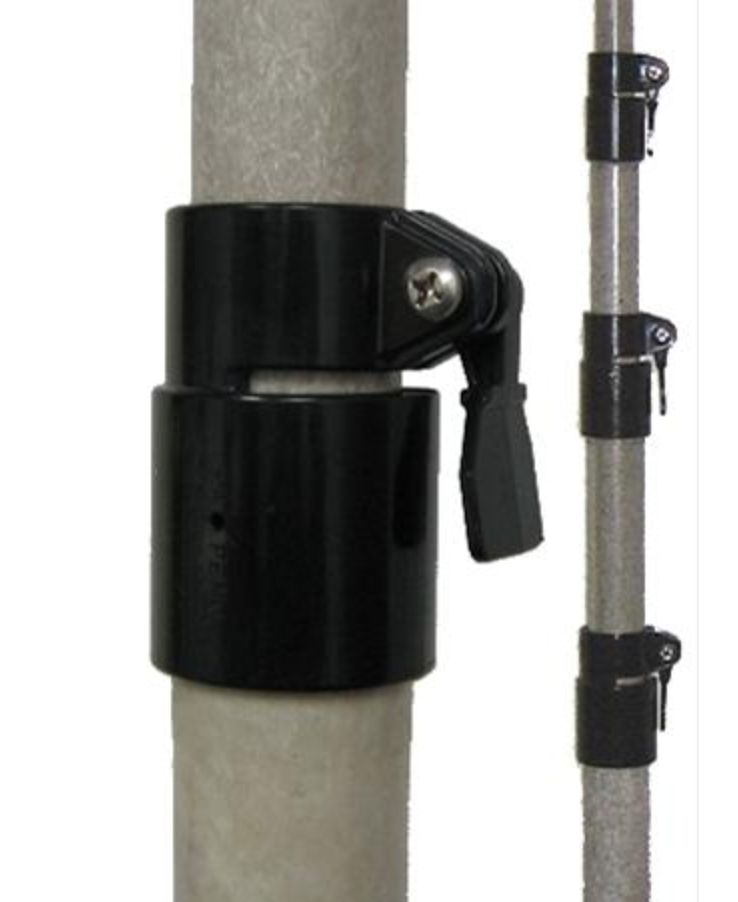
The original mast came with clamps that operated circumferentially. One of those snapped, and I replaced it with the vertical-lever design that is visible on the products shown in the vendor’s pages above. I prefer the new one as it seems much more robust, and clamps more securely (the first version was prone to letting the tubes slip if it wasn’t cranked down too much for comfort). Although I did just snap the new one also (to be fair, it was below zero and I dropped the pole on the concrete, fitting first). On balance, go with this clamp design until they come out with something better, and be forewarned that regardless the design the clamps are a weak link.
Collapsed height
I climb on my roof rack to put the antenna on top and to telescope the pole up. You could install the antenna on the ground and then put it vertical, but it has to be vertical (and securely clamped) before you can raise the telescoping portions. If the mast is really short, you can do this from the ground without a ladder. If the mast is as long as mine (I think I have the 7 ft collapsed height), there’s absolutely no way to do it from the ground. It’s not feasible to extend it and then stand it up—that’s not safe at all, trust me. You will need either a ladder, or to be able to stand on a roof rack as I do. Carrying a ladder may be silly, but not everyone has a roof rack they can stand on. The ladder can help you get it on/off your roof rack also (more on that later).
Max height & tube diameter
There are two ways to get the same height mast: start with a big diameter tube for the bottom section and end up with a medium diameter tube for the top section, or start out with a medium diameter tube and end up with a small diameter tube for the top section. I oversimplify, but you get the point. The first one is stronger but heavier; the latter is weaker but lighter. So depending on which height you choose, you may still have two different mast options for that same height. Check out the MGS webpage for the selections, you’ll see what I mean.
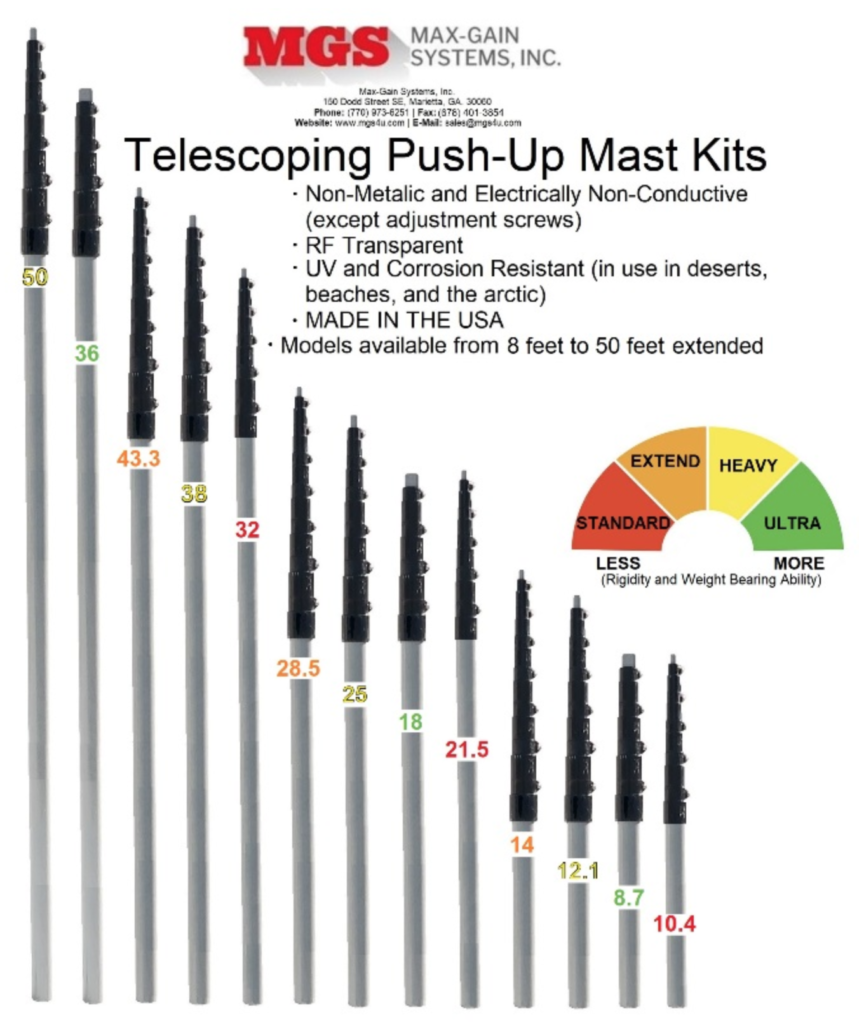
Of course, you can start with a big diameter tube and end with the smallest diameter tube possible. That will get you the longest possible mast.
Mine is the MK-8-HD. That’s 50 ft max height, 7 ft collapsed height, bottom section 2.5″ OD, top section 1″ OD. It’s the tallest they sell.
I do not always extend it to 50 ft. But usually I do.
Preparation
When you first get your mast, you NEED to do one very important thing. You NEED to mark the tubes at the maximum extension point.
When you’re lifting the tubes up, extending it straight into the air, there’s nothing to prevent you from pulling the tube completely out of the section below it. There’s no mechanical stop, nothing. Needless to say, this would be VERY bad, to have a ~40 ft long mast come toppling over at Incident Base because you pulled it out of the lowest section.
The only thing to do is to mark the tubes, with bright red nail polish, at the stopping point. Then you pay CLOSE ATTENTION when you’re lifting each section, and when you get to the warning mark, you stop lifting up that section, clamp it and start on the next.
Red sharpie is not good enough, trust me I’ve already tried it for you and it rubs off. Use bright nail polish.
The mast will come with instructions for this. They will tell you how much length you need to leave in the tube below it, so the whole thing is strong enough. Something like 10 inches. I just checked mine and I have my marks at 13 inches. Granted, you will lose a bit of ultimate height, but it’s worth it in case you get a little aggressive when extending it, and overshoot your mark by four inches or so.
Mast Base & Mounting
These things need to be securely fastened at the ground. Just propping it up and guying it out is not sufficient. I have two parts to my base:
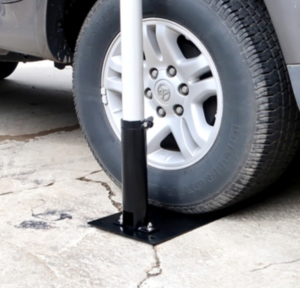
1. I use the commercial, drive-on-top-of-it receptacle. This just keeps the base from kicking around. It’s essential, but not nearly good enough by itself. There’s a version that is hitch-mounted as well.
2. I have aluminum tubes secured to my roof rack that swing out horizontally to make a triangle at ~7 ft. I strap the mast to this tube triangle, and it makes it super bombproof. You should think about some similar system with whatever you have. If you cannot rig up something rigid like that, they you will need to really securely guy out the first section before you start hoisting. And you might have to do more guying up the whole length that I do (next section).
Guy Lines
When there’s no wind, I can get away with no guy lines. But if I put up the mast with no guy lines when it’s calm, it’s a guaranteed method for causing the wind to pick up later on. So I always rig it with the guy lines, hanging from the ring, when I’m extending it, even if I don’t tie them out immediately, just so that I have the option if the wind picks up.
The guy lines take very little force to secure. This isn’t like guying out a tent. A fairly light weight—like a bin of gear or a backpack—resting out in the parking lot is more than enough of an anchor. The mast doesn’t have that much windage and doesn’t exert much force on the anchor, it’s just that the fiberglass is so flexible that a tiny bit of lateral force will bend it over.
To make it fastest and easiest to secure the guy lines, use one of the “guy rings” that are made for the purpose. It is way easier than tying on all three lines directly to the fiberglass.
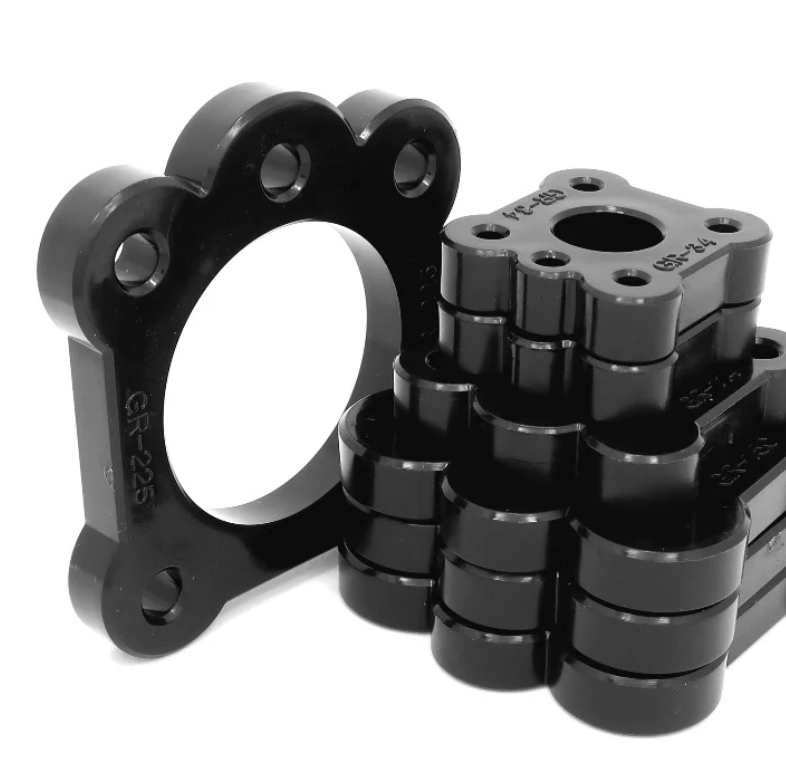
I only use one ring with three guy lines on it. I have the ring at the base of the topmost section. I have a second ring that I leave on at the bottom of the second section, just in case it ever gets really rowdy, but I don’t preemptively tie lines to it like I do the top ring. If we got into those sorts of conditions, I would lower the mast to tie on the extra lines. I’ve never had to do that yet, though I usually end up tying out the top three lines.
Do yourself and everyone else a favor and buy hot pink paracord with retroreflective thread sewn in for your guy lines. See my story below about the officer that caught his roof antenna on my black paracord. As IC, wherever you park your car becomes the de facto Incident Base, and the first people to arrive will park right next to you, and everyone else thereafter will be driving as close to IB as they can get. It’s usually dark, and with the standard triangle of guy lines, inevitably one of them will want to be in the middle of the parking lot. This is usually fine: just block it off with a trail of gear detritus (bins and whatnot) out to a gear-bin anchor, and all but the most incompetent of drivers will be able to avoid it. The bright pink retroreflective paracord helps.
Antenna
Which antenna are you going to put on top? My choice was easy—Peter gave me one. It also happens to the best choice out there for this purpose. It’s a dual-band j-pole antenna from Arrow Antenna, tuned for SAR frequencies. It’s the same antenna that I used for the portable repeater build (though I chopped that one in half for portability). The dual-band part is important, if you want to be able to use the UHF frequencies, e.g. if you use the radio mast system in conjunction with the portable repeater system.
Antenna Mount
How are you going to mount your antenna? There are lots of ways. Here’s one real easy way: clamp your antenna to a PVC tube, and slide the tube onto the top section of the mast. See the photos in the gallery. If you’re going to do that, you will need to get a PVC tube/top mast diameter that work with each other. I have a mast with a 1″ OD top section. A 1″ nominal diameter PVC pipe works well to slide right over that (1″ nominal pipe is actually quite a bit larger than 1″). This consideration may factor into which mast model you buy.
I capped the PVC tube (standard tube cap, glued on with standard PVC glue). Then I started using it just like that, i.e. slipped over the end of the mast, with the top end of the fiberglass resting against the PVC cap. On one mission, a state police pickup with a tall roof antenna was driving through IB and caught one of my paracord guy lines on his antenna (the paracord was black, and this motivated replacement with the bright pink retroreflective cord). By the time we had stopped him, the fiberglass mast was bent over nearly 90˚, with the antenna almost horizontal, and when we unhooked the guy line from his roof, the mast sprung back up like a catapult. Fortunately, it did not huck the antenna off—because the antenna could make a deadly javelin that could be seriously dangerous. After that, I drilled a hole through the top of the PVC tube, straight through the tippy top fiberglass tube of the mast, and I now pin the PVC tube to the mast before I raise it. The pin is visible in the photos. (The dangling cord can be used to tie the pin to the PVC tube so that it’s harder to drop it or lose it.) By the way I was amazed that the mast didn’t break—these things are super whippy.
Transport
The mast is long and pretty darn heavy. Unless you have some sort of RV command vehicle or a trailer, this thing is going to have to be strapped to your roof. I have a few tips and cautionary tales about this.
- Be very careful to fasten the clamps carefully. I forgot once to secure the very top clamp that holds the top section (or it came loose somehow) and at the first stoplight the top section nearly slid out the front onto the hood of my car. Because of that experience, I always put the top of the mast forward on the car, so that if something is going to happen while driving it will be up front where I can see it, stop, and deal with it, rather than hanging off the back of the car where I cannot.
- You need to be careful to strap the whole thing down so it doesn’t turn into a deadly joust. Stopping fast and having this thing shoot off your roof into the vehicle in front of you would be very bad.
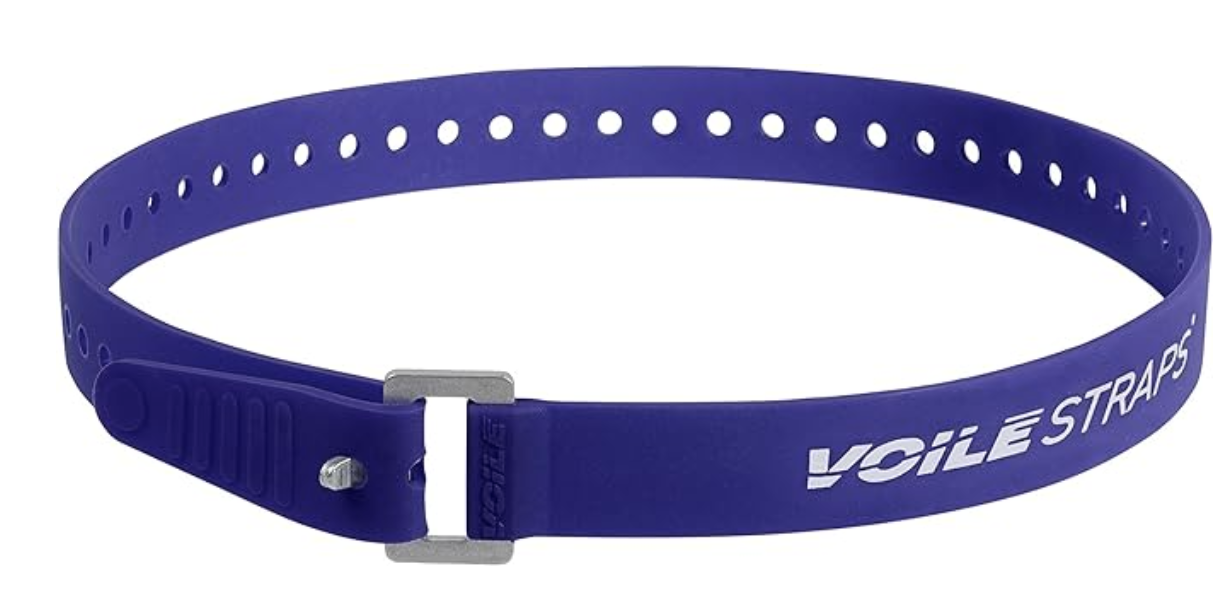
- To that end, I suggest a tie-down material that has a bit of stretch. I use the stretchy straps that are designed for securing skis (they make long ones). I have had good luck with the Voile brand, with aluminum buckles. They make them in different lengths. These are super quick to secure, and the stretch holds the mast must more securely than cord would. Cord is fine for side-to-side, but often the slippery fiberglass can still slide forward/aft. As a general comment, I have found that having the right tie-downs for each application saves me time when setting up and breaking down IB. I use these same straps to secure the mast to my tube triangle structural system bolted to the roof rack when I set it up at IB (I used to have a complicated custom-built fixture, which is visible in the photos if you look closely, but getting the tubes lined up properly was always a hassle. It’s way easier to simply strap the mast to the tubes.)
